Hyperspin System Download
Hyperspin offers the best arcade frontend & we have pre-configured it for you with all media, emulators & roms so thats its ready to plug & play! 90+ System Wheels (Includes ALL Media for each System & Game) Over 22,000+ Games Included (see systems / games below). Our Hyperspin Downloads Section can help you out with some missing sets, wheels, videos or whatever else you are looking for, even start off base builds!
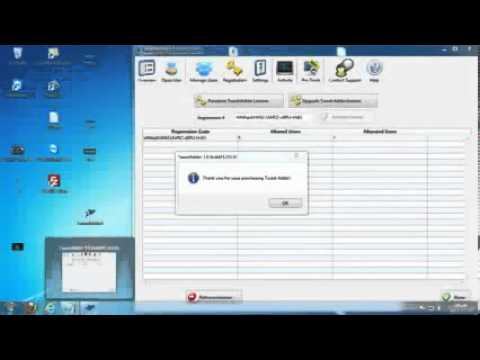 Description Tweet Adder 3.0.51 is available as a free download on our software library. The most popular versions among Tweet Adder users are 3.0, 1.1 and 1.0. TweetAdder3.exe, tweet adder3.exe, TweetAdder 2010.exe, TweetAdder.exe and TweetAdder4.exe are the most frequent filenames for this program's installer. TweetAdder was Twitter Users’ #1 ORIGINAL Effective Automated Twitter Management and Follower Building Tool of All Time for over 8 years. TweetAdder 4.0 software is currently no longer available, nor supported, due to an API cancellation by Twitter.
- Hyperspin Systems
- Hyperspin System Download Full
- Hyperspin System Download Software
- Hyperspin System Download
Foreword
RetroArch has become the choice of emulators for many players now and is increasingly popular since its launch few years ago. Its main reason is its ability to support multiple mainstream emulators and provide a unified configuration across all its offered emulators (or cores). For the uninitiated, RetroArch serves as the front-end for Libretro, which provides the cores for the emulators including BSNES, Ganbatte, and even MAME and MESS.Setting up RetroArch
First, download RetroArch builds here. I'll leave it to you whether to download the Stable build (v1.0) or the nightly builds (v1.1.x). The later support audio and video filters as well as more path configurations and possibly more ROMs compatibility especially for the MESS or MAME cores. For this tutorial I'm going to download the nightly build. If you're using the stable build instead, some of the configurations in the screenshots might differ, especially the configuration screen.
| Nightly builds for RetroArch which features the most recent core configurations for the RetroArch emulator. Make sure you download both the RetroArch and cores, which is basically the various emulators that RetroArch supports. |
Extract RetroArch.7z to your Emulators folder in the HyperSpin, such as G:HyperSpinEmulatorsRetroArch.
| Extracted files from RetroArch.7z archive. |
Next, extract the cores.7z into RetroArchcores.
Before we start to integrate RetroArch into RocketLauncher, let's start by configuring some of its initial settings.
Configuring RetroArch
You'll see the following welcome screen when launching RetroArch for the first time. It will then automatically create a configuration file named retroarch.cfg under its RetroArch root folder. This is the file that RetroArch will refer to whenever you launch RetroArch.| RetroArch welcoming screen when launching for the first time. |
| retroarch.cfg, which is the configuration file that RetroArch will refer to whenever it is launch.Notice that it is only a single line for now, and it will then be populated as we configure some settings within RetroArch. |
Navigating in RetroArch is relatively simple as shown in the welcoming screen. Pressing X to Enter/Confirm, Z to back.
The first thing we'll want to do is to configure some of the essential paths such as cores, roms, filters, shaders, etc. To do that, go to Settings > Path Options and setup the following:
| Settings. |
| Path Options |
| The default path options. We are going to configure some of the paths to point to the exact paths. |
The following settings are based on my RetroArch folder located in G:HyperSpinEmulatorsRetroArch. Change the path accordingly. Note that some of the options might not be available if you're using RetroArch stable build.
Browser Directory: The path to your ROMs such as G:roms. This path will be automatically loaded when you are trying to load a game.
Content Directory: Same as Browser Directory. The path to your ROMs.
Assets Directory: The path that stores assets.
Example: G:HyperSpinEmulatorsRetroArchassets
Config Directory: The path that stores RetroArch configuration files. Instead of storing it in RetroArch root folder we are going to store it here instead for better file structure management.
Example: G:HyperSpinEmulatorsRetroArchconfig
Core Directory: The folder that stores RetroArch cores (.dlls), which is where we extract our cores.7z just now.
Example: G:HyperSpinEmulatorsRetroArchcores
Core Info Directory: The folder that stores the core information (.info). These are also extracted from the cores.7z and is the same folder as the core directory.
Example: G:HyperSpinEmulatorsRetroArchcores
Content History Path: The path to the file that stores for a list of games that we had launched in the past in RetroArch. Leave it as default, which it stores in RetroArch root folder.
Example: retroarch-content-history.txt (default)
VideoFilter Directory: The folder that stores the video filters.
Example: G:HyperSpinEmulatorsRetroArchfiltersvideo
AudioFilter Directory: The folder that stores the audio filters.
Example: G:HyperSpinEmulatorsRetroArchfiltersaudio
Shader Directory: The folder that stores the shaders.
Example: G:HyperSpinEmulatorsRetroArchshaders
Overlay Directory: The folder that stores the overlay image such as gamepad, borders, keyboards, etc.
Example: G:HyperSpinEmulatorsRetroArchoverlays
Screenshot Directory: The folder that stores the screenshots captured in-game.
Example: G:HyperSpinEmulatorsRetroArchscreenshots
Savefile Directory: The folder that stores the savefile for the system. The savefile is the actual save file that is generated by the emulator and is usable even if you're using other emulators. For example, Playstation 1 memory card .mcr. Note that a separate folder that are named according to the system will be generated.
Example: G:HyperSpinEmulatorsRetroArchsave
Savestate Directory: The folder that stores the save state that you taken in game, or simply the memory content state at the point when you took it. Unlike savefile, save state are emulator dependant and you cannot simply load a save state taken in an emulator and attempt to load it using another. I simply point them to the same folder as my Savefile Directory
Example: G:HyperSpinEmulatorsRetroArchsave
System Directory: The folder that stores the system file such as BIOS for each system. For example, SCPH-1001 for Playstation 1, MESS BIOS, etc.
Example: G:HyperSpinEmulatorsRetroArchsystem
| The completed Path Options screen after you had properly set the path. |
After you had done that, go back to the Main Menu by pressing the 'Z' button and save the configuration file. The changes that you made will be saved in RetroArch-timestamp.cfg under the config folder that we just specify.
Hyperspin Systems
| Save the changes that we did in a new configuration file. |
The configuration file will be located in the config folder that we specified earlier, which is G:HyperSpinEmulatorsRetroArchconfig and is named RetroArch-timestamp. Since RetroArch will refer to retroarch.cfg in its root folder by default, we will now copy and replace the retroarch.cfg with this file, just in case RetroArch config file is not updated.
| The updated retroarch.cfg file. |
And that's it! We had done the initial configuration for RetroArch. Now moving on to integrate RetroArch with RocketLauncher so that it will run RetroArch for the system that you want.
Integrating RetroArch in RocketLauncher
As usual, open RocketLauncherUI and add a new Emulator named RetroArch under the Global Settings.
| Adding RetroArch emulator to RocketLauncher for the first time. Notice that I only have several Roms extensions that these are the systems that I emulate using RetroArch. |
Now here is where most people are mislook, even myself! For each module, there is a separate options that you can configure either for global module settings or per game settings.
To configure the module settings, click on the Modules tab, then select RetroArch.ahk from the Installed Modules window. Next,click the Edit Global Module Settings button.
Press the X button when ask whether to select a system in the System Selection screen.
| Close this dialog since we're going to configure global settings. |
Next, click the magnifier icon next to ConfigFolder option to select the RetroArchconfig folder.
| Configure the ConfigFolder used by RetroArch module. Ignore the MESS_BIOS_Roms_Folder for now as it is only needed if you want RetroArch to emulate MESS. |
Now then, go and select a system in the left hand panel and use RetroArch as the default emulator. For example, I had selected RetroArch as my default emulator for Nintendo Game Boy system.
| Set RetroArch as the default emulator for your system of choice. For example, Nintendo Game Boy system. |
And there you go. RocketLaunch is now configured to launch RetroArch for your system of choice. Try to audit some games and click the Rocket icon to launch the game!
Setting Another Core as Default for A Game System
By default, RetroArch uses a default core for a particular game system. For example, VBA Next core for Nintendo Game Boy Advance. In my personal preference, I would prefer Ganbatte, which supposedly give more accurate emulation.To change the default core for Nintendo Game Boy Advance in RetroArch, select GLOBAL system in the left panel, go to Modules tab and select RetroArch.ahk. Next, click the Edit Global Module Settings button.
| Edit Global Module Settings for RetroArch.ahk module. |
| Select the system that you want to change the default core. In this example, I'm changing the default core for Nintendo Game Boy Advance, which uses VBNext core by default. |
| Click the magnifier icon next to LibRetro_Core option and select the core that you want to replace. |
| I'm selecting gambatte_libretro.dll as the default core to emulate my Nintendo Game Boy Advance system. |
Now, to test it, audit the game and click on the Rocket icon to run it. Press F1 and you should see the core replaced by the core you selected.
Setting Up Cores in RetroArch
MESS (Multi Emulator Super System)
Setting up MESS in RetroArch could be rather difficult if you don't know what to configure. Luckily for you, I had gone through that experience and hence the purpose of this tutorial.First, you'll have to download MESS BIOS files and put it in your RetroArchsystem folder. MESS requires BIOS since it is an emulator that emulates other emulators. Sound confusing? I hope not.
Note that the RetroArchsystem folder is not only to put the MESS BIOS. In general, this is the path where you are supposed to put the BIOS for other systems, such as PSX, GBA, etc.
You can download MESS Complete BIOS Pack (as well as BIOS files for other system) files from Emuparadise.
| A list of BIOS files used by MESS. Notice each BIOS is archived. Extract this to your RetroArchsystem folder such as G:HyperSpinEmulatorsRetroArchsystem |
| The extracted MESS.zip files in RetroArchsystem folder. |
Note: There is no need to extract these BIOS zip files as RetroArch MESS core will handle by themselves.
Next, you'll also need to create a retroarch-core-options.cfg file within RetroArch root folder in case it is not there. We're going to add the following lines corresponding to MESS core options manually here in order for us to load the cartridges instead of softlist, such as Atari 5200 .a52 files. The reason we need to do this is you can only access Core Options once you had successfully loaded a game. And with the default settings, loading Atari 5200 ROM file such as XXX.a52 is not possible with softlist settings enabled and media type that is not set as cartridge.
It can get fairly complicated to explain. More on why here and here.
mess_softlists_enable = 'disabled'
mess_softlists_auto_media = 'disabled'
mess_softlists_auto_media = 'disabled'
mess_media_type = 'cart'
mess_boot_to_bios = 'disabled'
mess_boot_to_osd = 'disabled'
mess_boot_from_cli = 'enabled'
| Settings for MESS in retroarch-core-options.cfg |
Do not confuse this with the retroarch.cfg that we configured earlier on. As the name suggest, this is configured per-core basis and can varied from core to core, whereas retroarch.cfg is global settings and does not in any way related to the core.
Next, open up RocketLauncherUI, go to GLOBAL settings, select Modules, and then select RetroArch.ahk. Click the Edit Global Module Settings, then click on the magnifier icon right next to MESS_BIOS_Roms_Folder and select the path to your MESS BIOS, such as G:HyperSpinEmulatorsRetroArchsystemMESS
| Configuring MESS BIOS ROMs folder that MESS core will use in RetroArch. |
Now try to audit some system ROMs using MESS such as Atari 5200. If you're seeing a blank screen, that simply means that the MESS core in RetroArch cannot emulate it.
More Information
Libretro - MAME/MESS/UME CoresMESS User's Manual
Atari 5200
From my personal experience, the MESS-libretro core in RetroArch still requires some work as it can only emulates a partial of Atari ROMs that I got. What I meant by partial is that you'll see a blank screen for ROMs that it cannot emulate, such as Frogger. You might want to consider to setup Kat5200 or Atari800/Atari800 Win Plus to emulate the Atari 5200 ROMs.Extra Readings
General Information on EmulationHyperspin System Download Full
Final Note
More core setup will be added as I started to use RetroArch!I know full well how unpopular the pre built sets are to some people. I have an old set up I made and screw with (just 5 or 6 systems), bottom line I'm considering it. Looking to get advice from people who have actually USED these drives, not just heard stories. Silmarillion audiobook martin shaw download. Looking for support on windows 7,8, or 10, using 1 to 4 xbox controllers, on an HD TV, 1080p.
Hyperspin System Download Software
These are what I found so far, leaning toward the first link.. http://www.hyperspin-systems.com/collections/all